
Have a question? Enter a search term. Or give us a call at 1-888-518-0818

Night Vision is a new scheduling feature in Mission Control that helps users quickly find available appointment time slots based on technician availability, skills, departments, and locations.
This feature streamlines scheduling by displaying available time slots and allowing users to create appointments directly from the results.

In Mission Control, open the Night Vision scheduling tool to search for available appointment times.
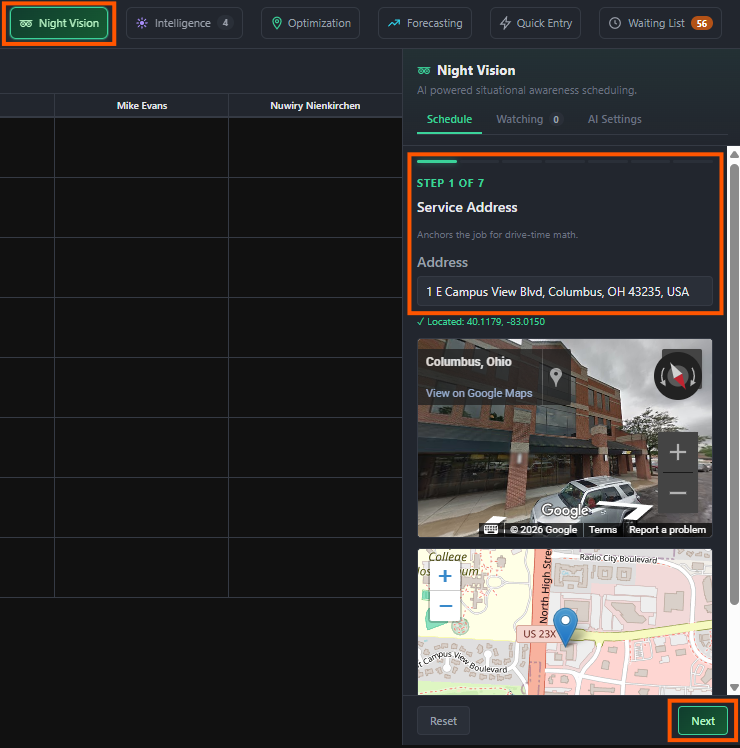
Begin by entering the customer’s service address.
The address helps determine available scheduling options based on location and technician availability.
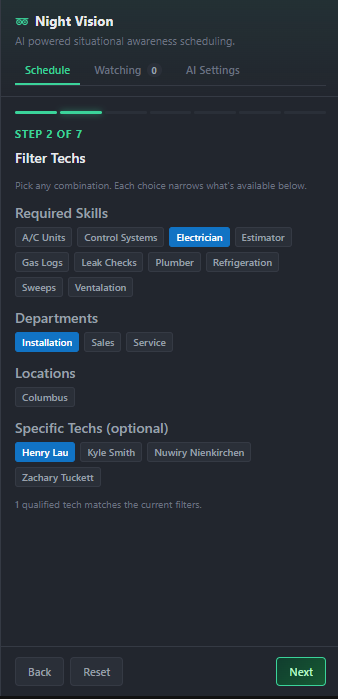
Choose the scheduling filters needed for the appointment, including:
● Skill
● Department
● Location
● Technician (optional)
As selections are made for skill, department, and location, the employee list will automatically filter to display matching technicians.
This makes it easier to identify qualified and available resources for the job.
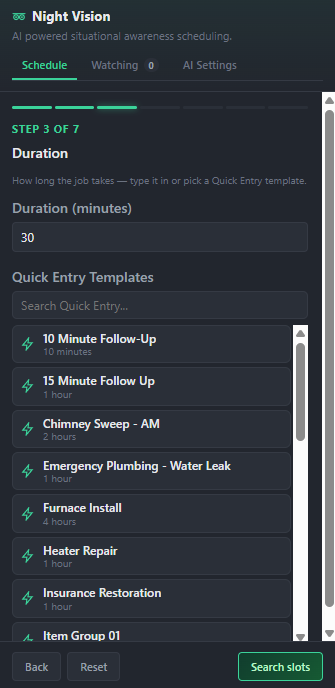
By default, the appointment duration is set to 30 minutes.
Users can also select a quick-entry duration option to automatically update the appointment length.
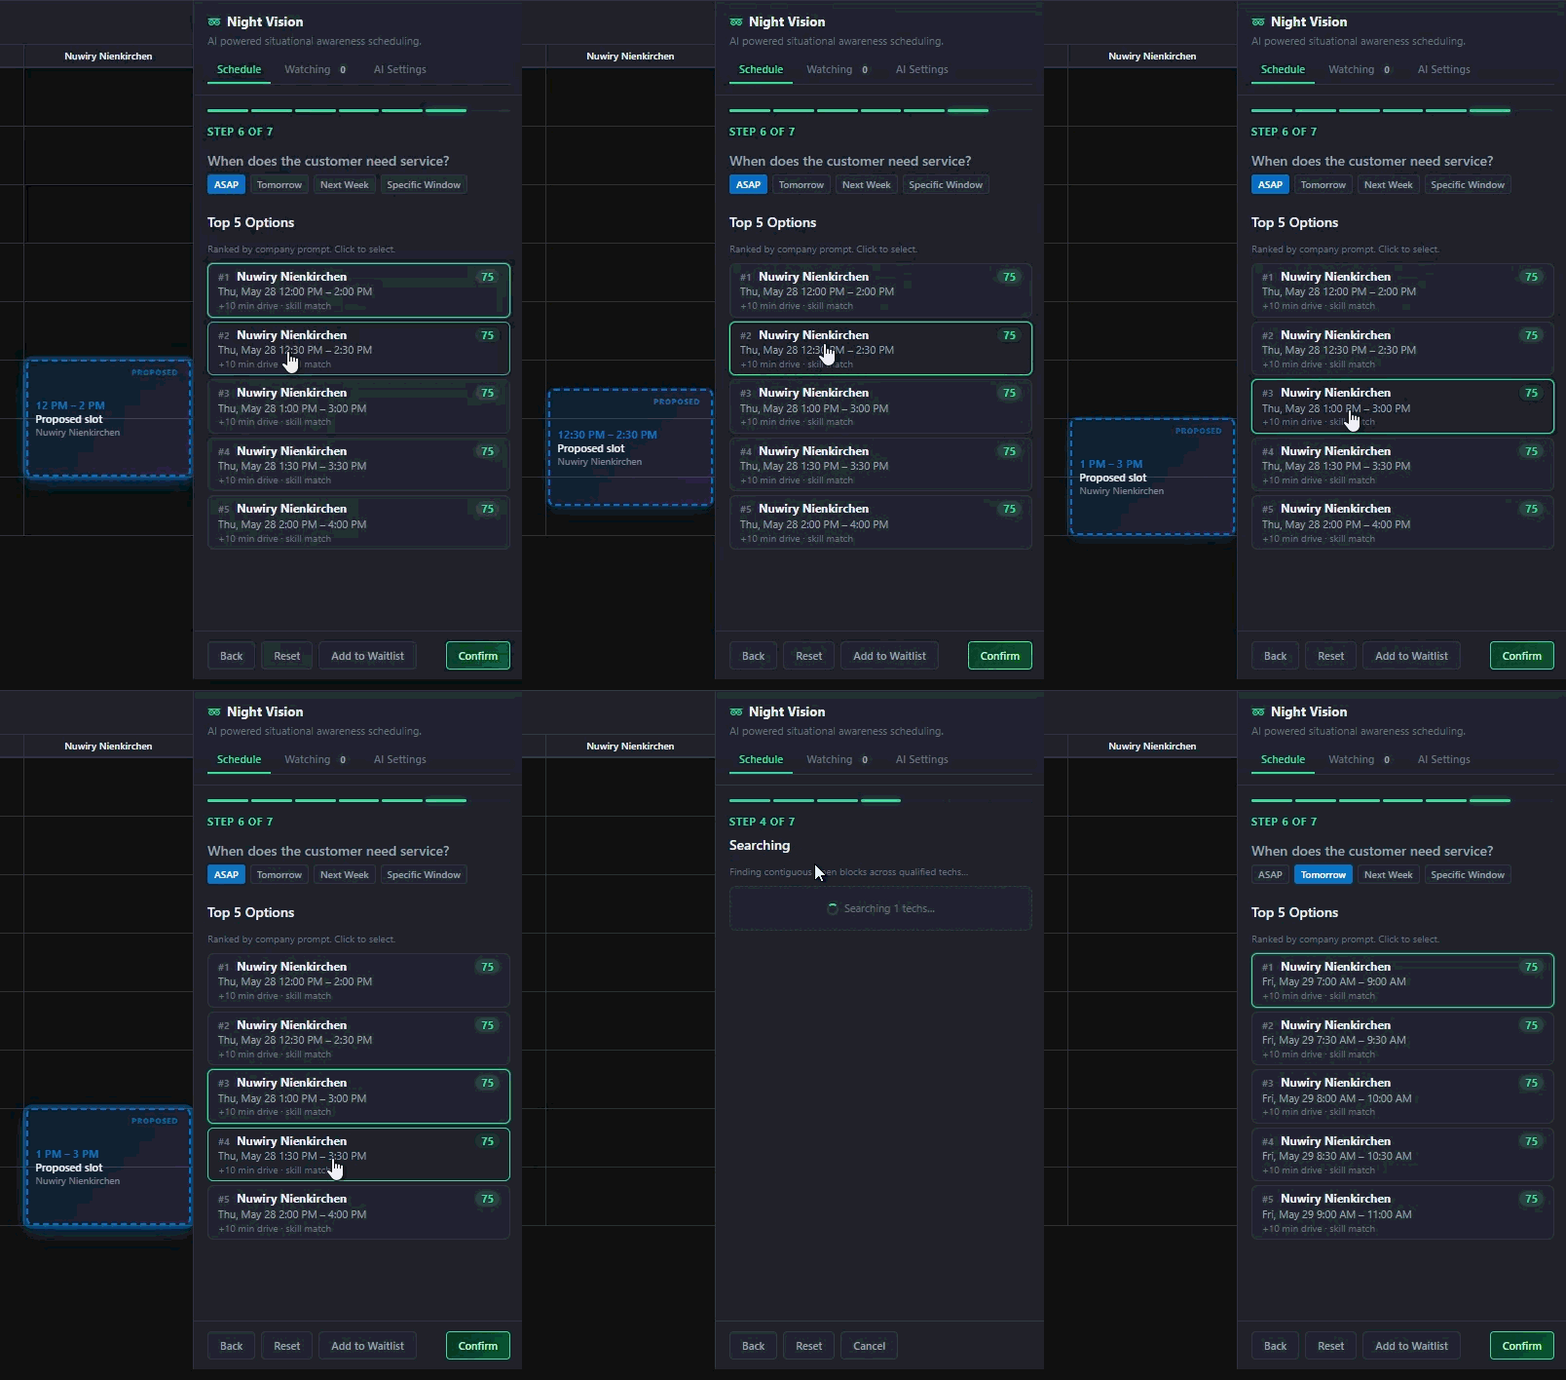
Select the desired service timeframe.
Night Vision will then display a list of available appointment slots that match the selected criteria.
Selecting one of the available slots will display the proposed appointment time.
Click Schedule It to create the appointment.
The system will:
● Open a new appointment
● Apply the selected date and time
● Assign the selected technician
After the appointment opens, search for and assign the customer to complete the scheduling process.
