Have a question? Enter a search term. Or give us a call at 1-888-518-0818
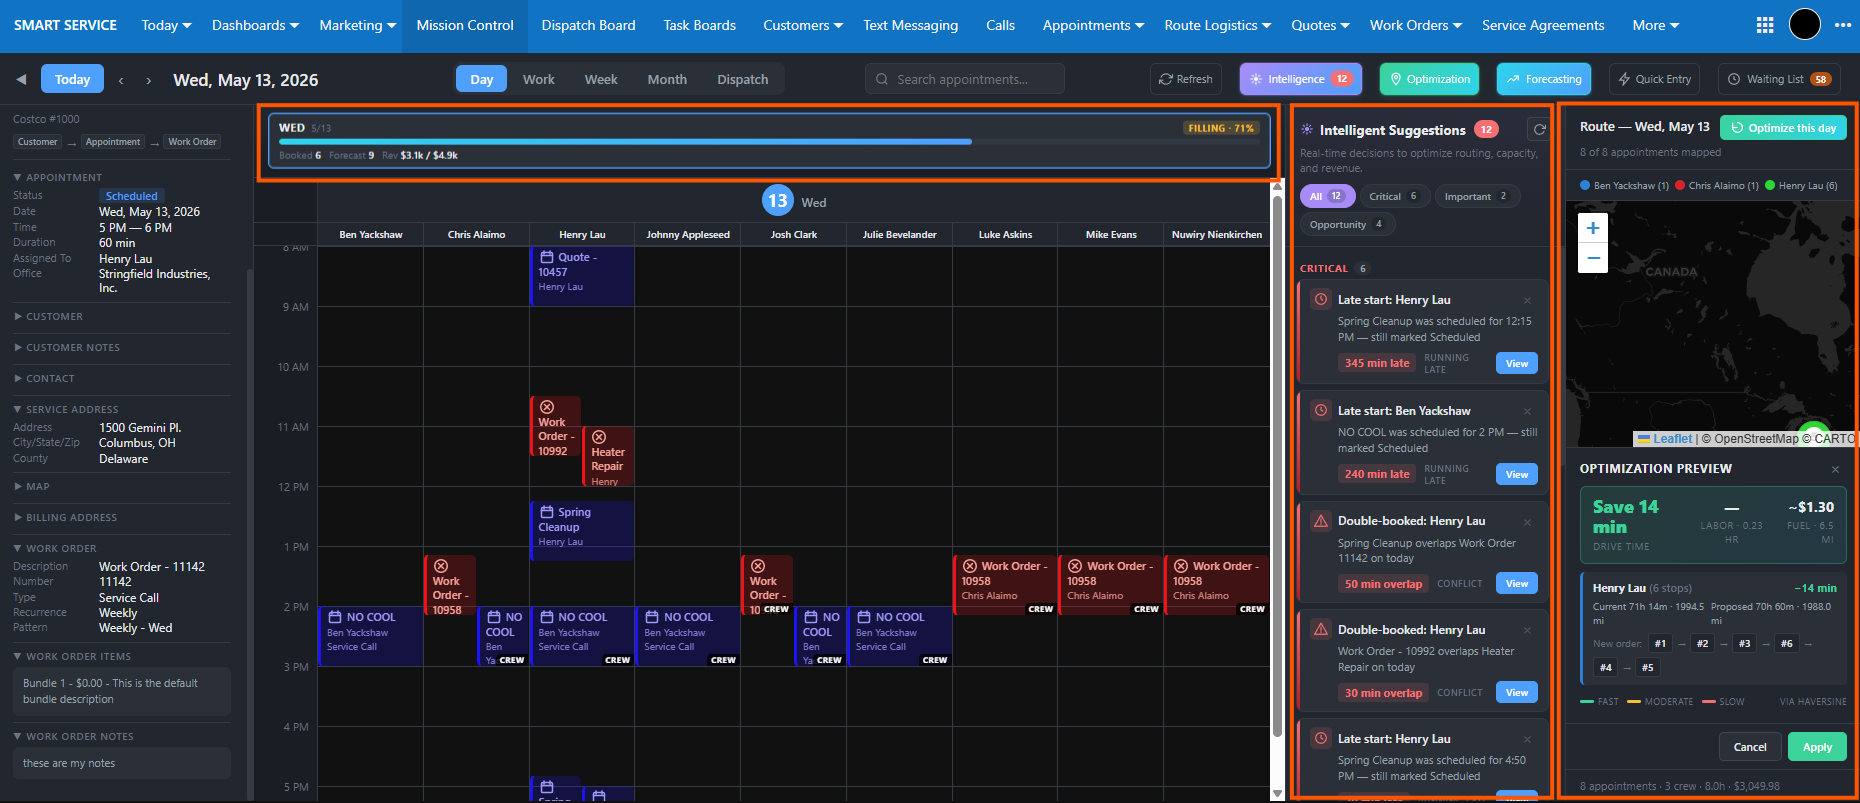
The Mission Control Center in Smart Service Cloud is your all-in-one command hub for scheduling, dispatching, and operational awareness. It brings together your calendar, routing, insights, and forecasting into a single, interactive workspace—designed to help you make faster, smarter decisions throughout the day.
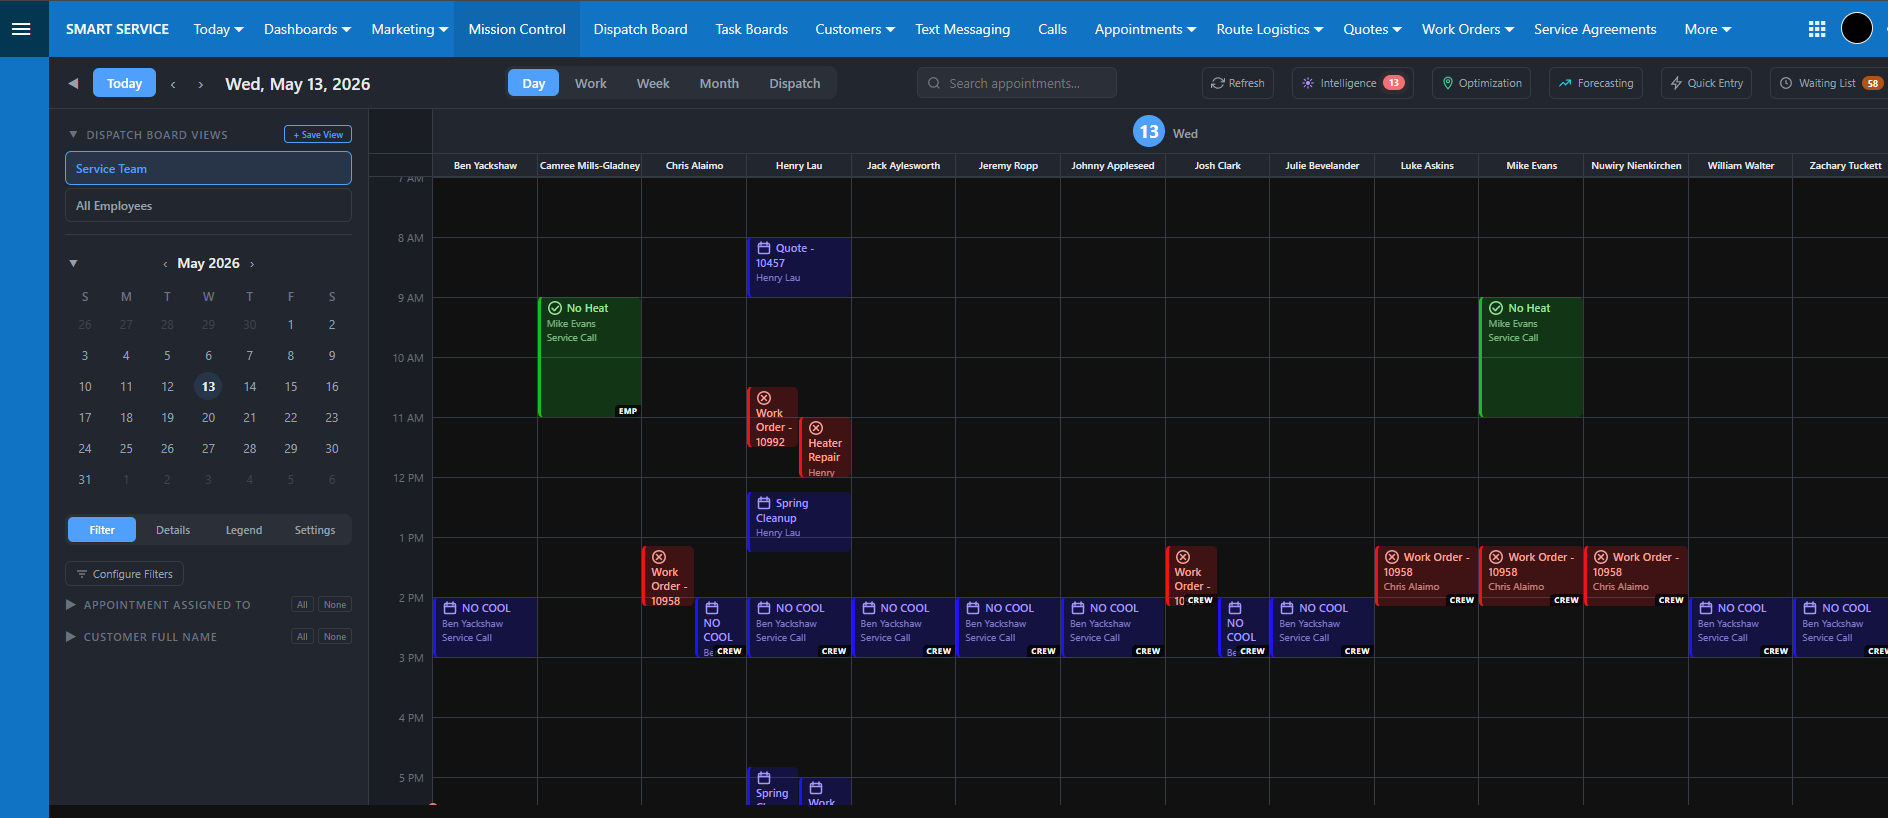
Mission Control transforms your daily schedule from a static calendar into a dynamic, intelligent system. Instead of simply displaying appointments, it actively helps you:
● Identify inefficiencies
● Optimize technician routes
● Evaluate potential scheduling openings and conflicts
● Forecast upcoming workload and revenue
We will cover each function located at the top of Mission Control individually.

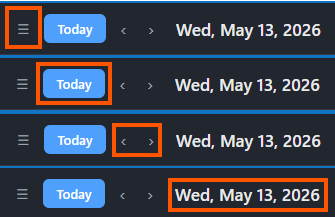
● Panel Toggle: When collapsed, select the three-line icon to expand it again.
● Today Button: Instantly return to the scheduled appointments for today.
● Date Navigation: Use the small left "<" and ">" right arrows to move back or forward by a single day.
● Current View Display: The date shown reflects the specific day, week, or month active on your screen.
Day: Displays only the selected day.
Work: Displays Monday-Friday. (5-day)
Week: Displays Sunday-Saturday. (7-day)
Month: Displays all days within the selected month.
Dispatch Board: Provides a horizontal layout of your daily schedule.


● All-Inclusive Search: Utilize the search box to locate information via employee, customer, or crew, as well as by appointment title, category, department, site, description, or Work Order Number.
● On-Demand Refresh: Click the refresh icon to sync Mission Control data instantly without the need to refresh your browser tab.
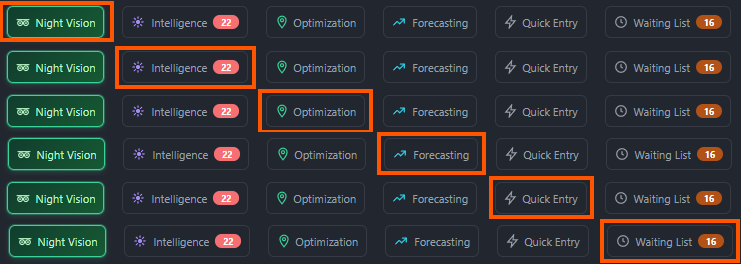
● Night Vision: Streamlines scheduling by displaying available time slots and allowing users to create appointments directly from the results.
● Intelligence & Optimization: Access dedicated right-hand layers for intelligence and optimization tools.
● Forecasting: View the heat map calendar in any active view to compare projected versus actual scheduling.
● Quick Entry: Open the Quick Entry layer to quickly add template-based appointments to the calendar.
● Waiting List: View a bottom layer that displays all jobs currently set to "Waiting" status.
All layers can be hidden by selecting the corresponding button in the top-right corner.
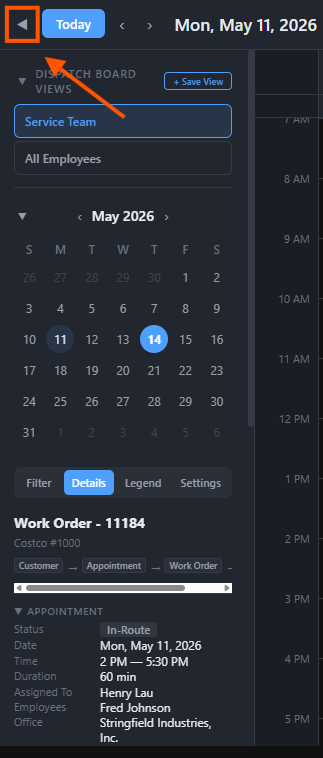
Positioned to the left of the Mission Control calendar, the Mission Control Panel is a collapsible interface that centralizes essential management tools.
This sidebar provides rapid access to several primary resources, including Mission Control Settings, the Color Legend, Appointment Details, Filters, the Collapsible Calendar, and saved Dispatch Board Views.
Mission Control Panel Toggle: Click the arrow to the left of the "Today" button to collapse the left panel.
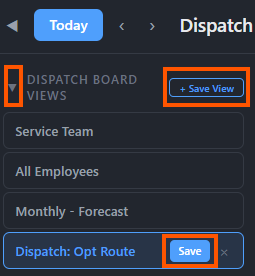
The Dispatch Board Views feature enables you to save frequently used configurations, including specific settings, filter options, and viewing preferences.

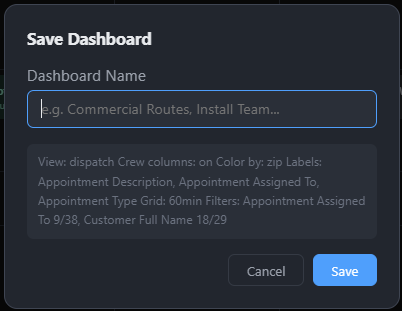
To establish a new view, select "+ Save View," enter a name in the pop-up window, and click "Save".
For example, a view saved while filtered for a specific customer and set to "Work" will retain those exact parameters when reopened.
The name of your new view will then appear in the top-left corner.
You can collapse this section by clicking the downward-pointing arrow and expand it again to reveal your saved options.
Saved Dispatch Board Views can also be modified by hovering over the specific view name and selecting the “Save” option to update it.
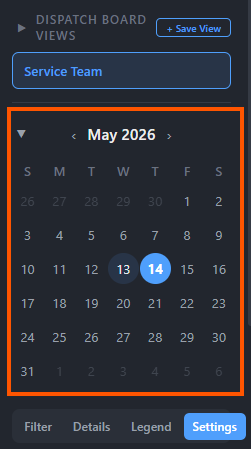
Located under Dispatch Board Views is the Collapsible Calendar.
Use the downward arrow to hide it and the upward arrow to make it visible again.
Navigation is straightforward: select the left arrow to go back one month or the right arrow to move forward.
Clicking a specific day will update your main display to show the day, week, or month view for that date, depending on your current settings.
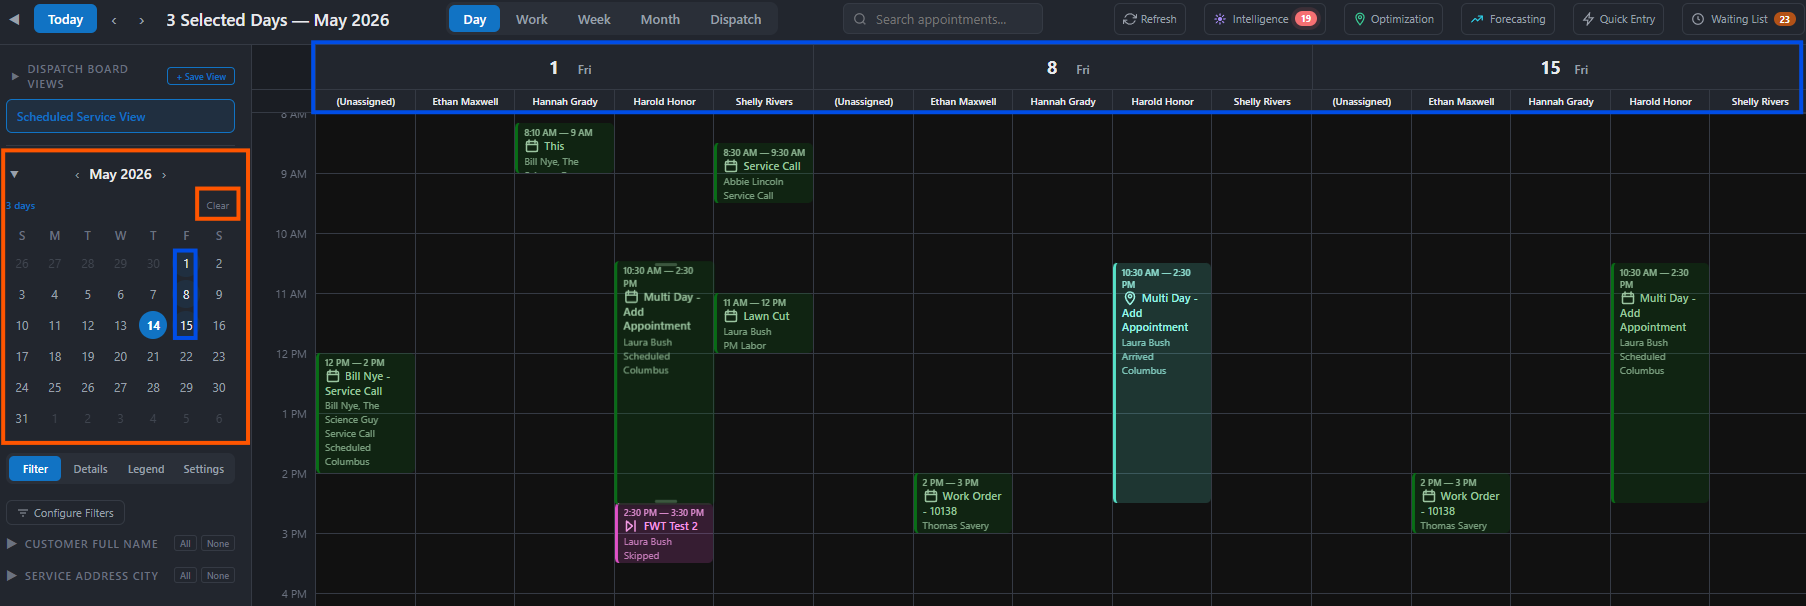
To display several non-sequential days on your calendar simultaneously, use the keyboard shortcut by holding the [Ctrl] key while clicking the desired dates.
To display several non-sequential days on your calendar simultaneously, use the keyboard shortcut by holding the [Ctrl] key while clicking the desired dates. Mission Control will then present these selected days in a side-by-side view.
To reset your view or delete these choices, click the "Clear" button located in the calendar's upper-right corner.
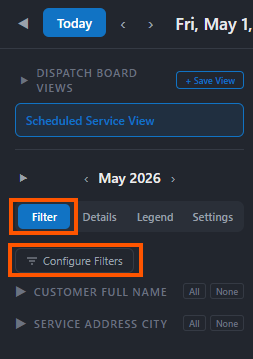
Filters allow you to refine your calendar view based on specific criteria, such as customer name, service address, city, or appointment status.
To change or add Filter options, select "Configure Filters".
In the "Customize Filter Fields" box, you can drag and drop fields into your preferred order.
Activate a filter by checking the box next to its name, or deactivate it by unchecking the box.
Once your selections are made, click "Apply".
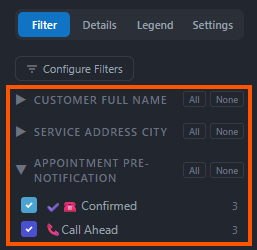
Your active filters will appear on the left panel, allowing you to quickly toggle options.
Use the "All" button to include all available items or the "None" button to clear all selections.
The number displayed to the right of each filter option indicates the total results currently available on your calendar.
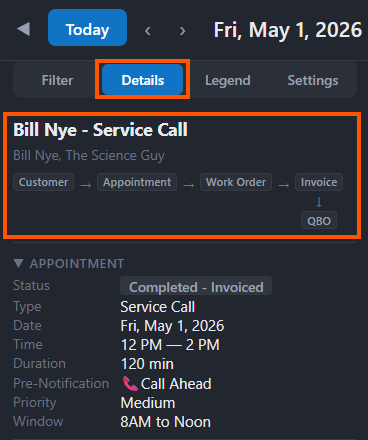
Selecting an appointment from the calendar opens the Details view, which provides access to all records associated with the selected appointment.
Below the appointment name, you will find the customer's name followed by a breadcrumb trail: Customer → Appointment → Work Order → Invoice.
You can select any of these available options to open the corresponding record.
If an invoice has been posted to QuickBooks, a "QBO" link with a downward-pointing arrow will appear; clicking it opens the invoice in QuickBooks Online in a new browser tab.
The interface is organized into several collapsible sections, each featuring a downward arrow to hide or show information:
● Appointment and Customer Details: View specific data for the scheduled job and the client.
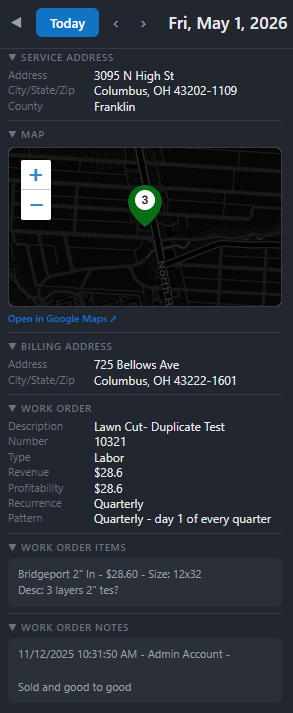
● Contact Information: Access the contact email and service address.
● Map Integration: An interactive map lets you zoom in for more detail. You can also select "Open in Google Maps" to view the location in a separate tab or collapse the map entirely.
● Billing and Work Orders: Review the billing address, work order details, notes, and a comprehensive list of all work order items.
The Legend feature allows you to categorize and color-code calendar appointments based on specific criteria. Available dropdown options for color-coding include:
● Appointment details: status, assignee, type, description, pre-notification, priority, or window.
● Customer and Location info: Service address, City, ZIP code, State, customer type, or customer class.
● Work Order data: work order type, work order, or sales rep.
After selecting a "Color By" option, the Legend will display the relevant results and their assigned colors.
Note that the Legend only shows results for appointments currently visible on your calendar; for example, if your current view only contains "completed" jobs, only that status will appear in the Legend.
To customize colors, click the color box to the left of any option. In the pop-up, you can select a specific shade by clicking or dragging the selector.
To exit the color picker, simply click outside the pop-up window. Additionally, use the "Name and Count" button to modify the display order of your Legend options.
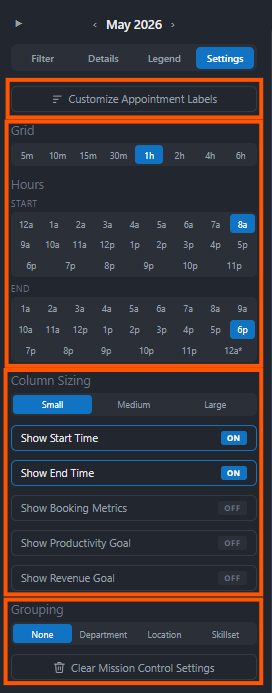
The Settings menu provides tools to fine-tune your Mission Control experience and customize the calendar interface.
● Appointment Labels and Icons
● Calendar Grid and Time Scale
● Display and Sizing Options
● Grouping and Resetting
Appointment Labels
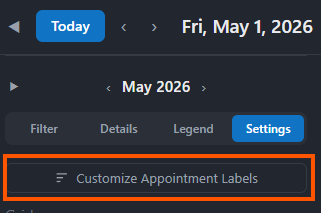
To modify how appointments are displayed, select "Customize Appointment Labels."
On the "Customize Event Label" page, you can reorganize the label options by dragging and dropping them into your preferred sequence.
Activate specific details by selecting the checkmark next to the option name.
Note that the appointment time is always displayed first if enabled.
Click "Apply" to save your label configurations.
Appointment Label Icons
Mission Control appointments feature visual indicators for status and billing.
Each appointment displays a status icon, and an additional invoice icon appears once the appointment has been invoiced.
For crew-based assignments, the interface distinguishes between roles on the event label.
If an employee is assigned to a crew but is not the designated lead, a "crew" indicator will appear in the bottom-right corner of their appointment label.
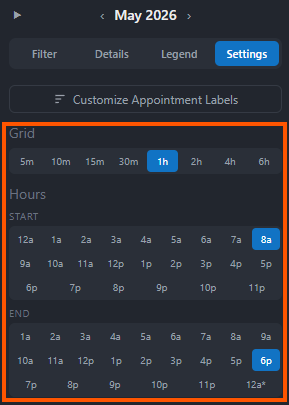
Calendar Grid and Time Scale
In the Grid section, you can define the time increments shown on your calendar. Available intervals include 5, 10, 15, and 30 minutes, or 1, 2, 4, and 6 hours; simply click an option to activate it.
You can also establish the operational hours for your calendar by selecting specific times under the "Start Hours" and "End Hours" categories.
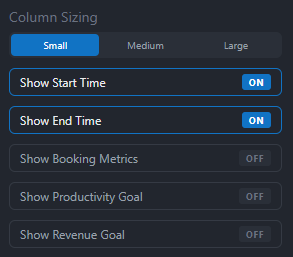
Display and Sizing Options
When using the Day, Work, Week, Month, or Dispatch views, you can adjust column sizing to Small, Medium, or Large.
The following interface elements can be toggled on or off:
● Show Start Time and Show End Time: These settings control the visibility of start and end times on event labels.
● Show Booking Matrix, Show Productivity Goal, and Show Revenue Goal: These options manage the tracking data displayed at the top of the calendar for specific days or employees.
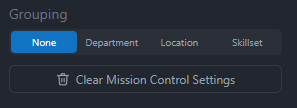
Grouping and Resetting
The Grouping feature allows you to organize calendar results by Department, Location, or Skill Set, or you may select "None" for a standard view.
To revert all current customizations to their original state, select "Clear Mission Control Settings" to restore the calendar to its default configuration.
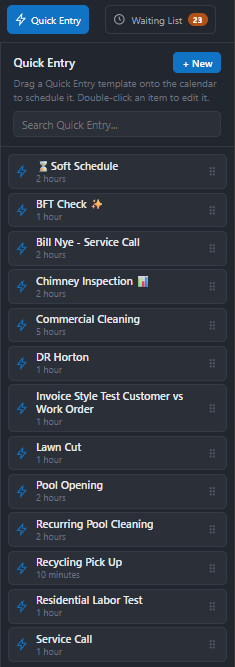
Quick Entries are a vital component of Smart Service Cloud, designed to automate the creation of repetitive, standard appointments.
These templates allow you to generate work orders and quotes populated with predefined details.
By simply dragging and dropping a Quick Entry onto your calendar and selecting a customer, you can streamline your scheduling workflow.
To build a new template, select the "+ New" button located on the Quick Entry panel. A configuration window will appear where you can specify appointment details, such as a one-hour duration for standard service calls.
To modify an existing template, visit the Quick Entry page within the Administration Center. Note that while updates apply to all future appointments, they will not retroactively change those already scheduled on your calendar.
To use a Quick Entry, drag it from the right-hand menu and drop it onto the specific date, time, and technician on your calendar. While these entries use template data, you retain full flexibility to click and adjust any specific details after the appointment is placed.
The Waiting List, accessible via the button at the top right of Mission Control, contains jobs that have been created but not yet scheduled.
This panel can be expanded by clicking and dragging its border.
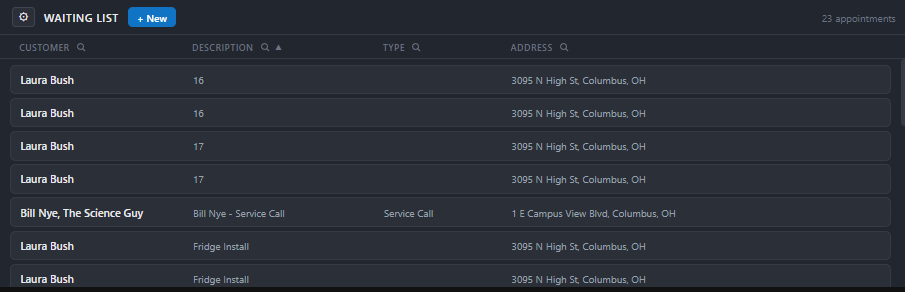
Filtering and Sorting
To refine your view, select the magnifying glass icon next to customer, description, type, or address.
Enter your search criteria and click "Apply" to filter the list.
You can also automatically reorder the waiting list in ascending or descending order by clicking on the customer, description, type, or address headers.
Scheduling and Job Details
● Scheduling a Job: To schedule a job from the list, drag and drop it directly onto the calendar.
● Moving to Waiting: If you need to move a scheduled appointment back to the Waiting List, drag it from the calendar into the bottom panel. This will update the appointment status to "Waiting."
● Viewing Information: Click any job in the list to view its appointment details.