Have a question? Enter a search term. Or give us a call at 1-888-518-0818

For users of Smart Service Cloud, payment processing is streamlined through Fiserv integration. This allows your team to accept and process transactions seamlessly, whether in the office or in the field. Payment functionalities are accessible within Quotes, Work Orders, Invoices, and Customer Records. Should a payment be processed independently of an Invoice, the payment record can be linked to the corresponding invoice at a later time.

If your team converts work orders to invoices in the field, the resulting invoice will open automatically for them. Otherwise, if you’d like to see all of the open invoices at once, go to Accounting > Invoices.
From the “Invoices” screen, you can filter your invoices by clicking on the Filter tab or the Status header and filtering for open invoices. Or you can find a specific invoice by using our search features.

Once you open the desired invoice click on the “Pay” button at the bottom to take payment now. You could also send the invoice to the customer using the “Send” button where they could pay online.
To accept in-person or over-the-phone payments, click the "Pay" button at the bottom of the invoice. Enter the customer's payment details and then click "Process Payment." You will receive a confirmation if the payment is successful. If there's an issue, such as incorrect information or insufficient funds, you will be notified after clicking "Process Payment."

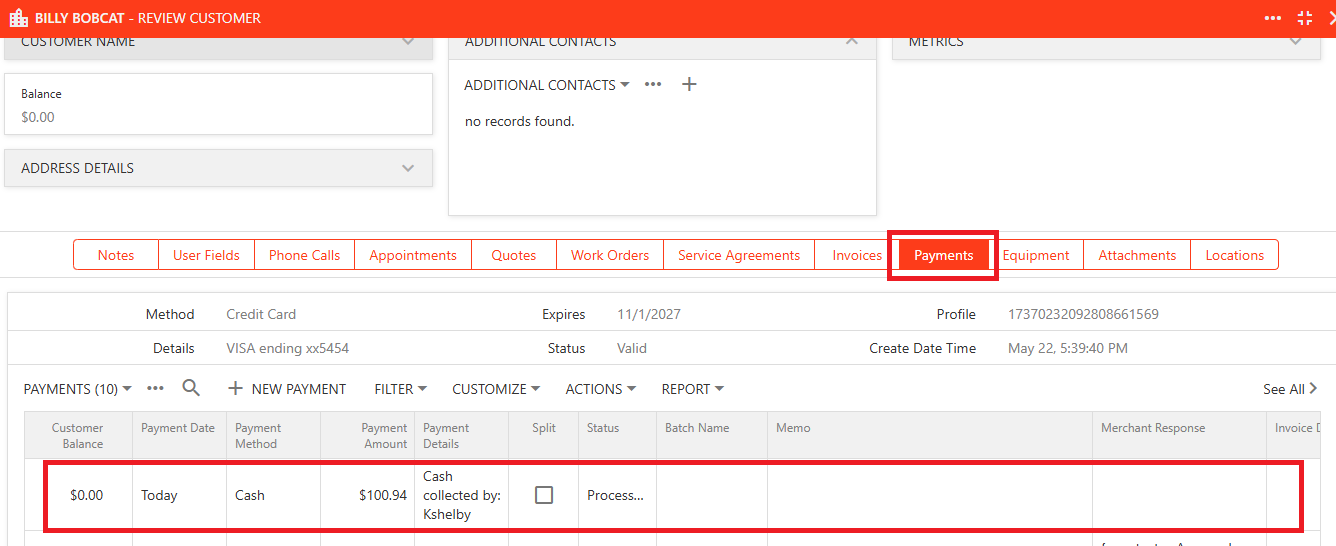
Payments processed outside of an Invoice (e.g., on a Quote, Work Order, or from the Customer Record) require manual association with the relevant invoice. Navigate to the specific customer's record and then select the "Payments" tab. In the Payment section, select the payment Record.
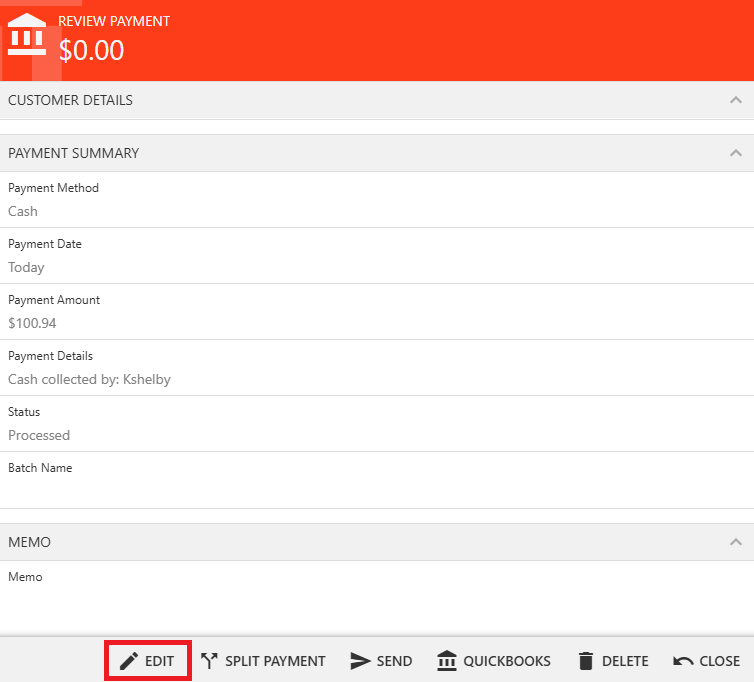
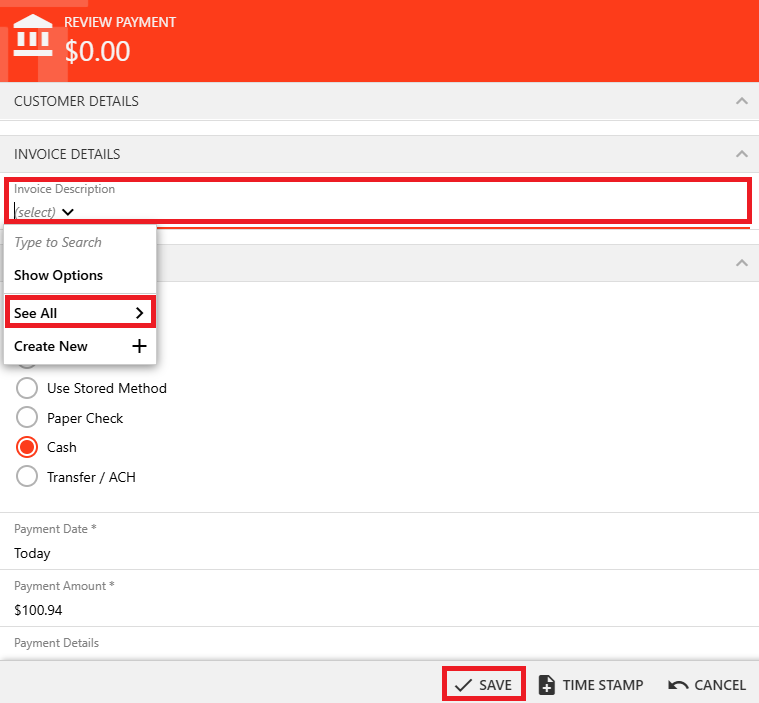
Once the payment record is open, select “Edit”. In the "Invoice Description" drop-down menu, select "See All >" to view all invoices associated with the customer. Use the scroll bar at the bottom of the box to view additional information for the invoices. Select the corresponding Invoice.
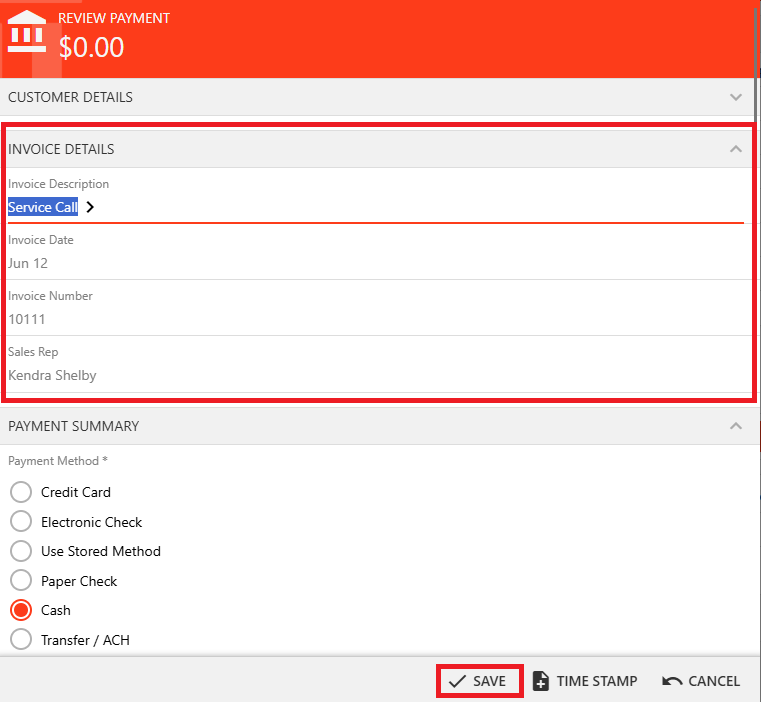
Once the Invoice is selected, the payment record will update the Invoice Details to display the selected invoice's information. Select "Save" to update the payment record and associate the payment with the invoice.
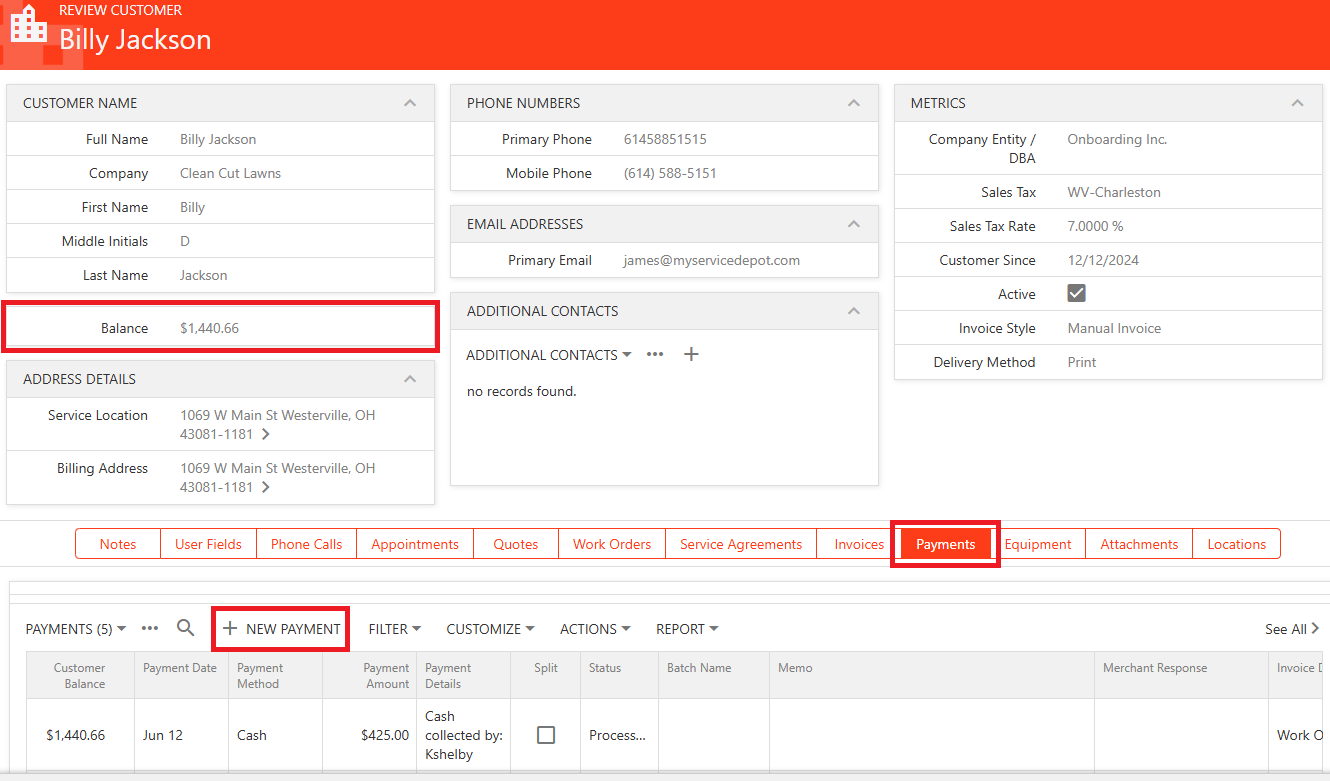
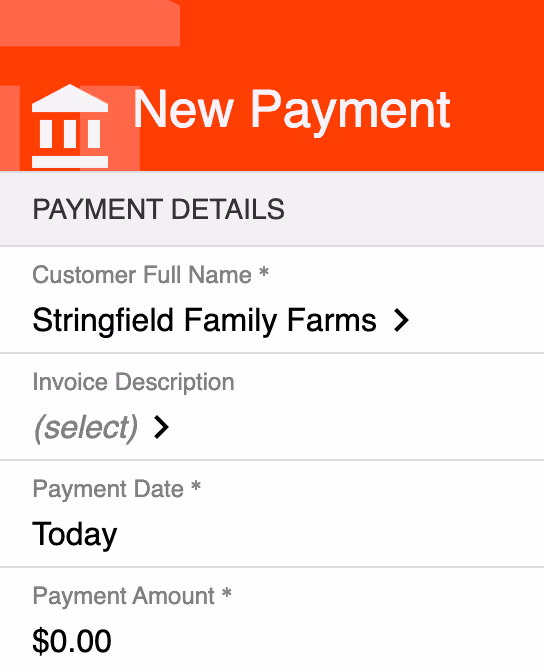
You can apply a single payment to multiple open invoices by processing the payment through the Payments section of the customer's record. This makes it easy to manage and allocate payments across outstanding balances in one simple step. To apply a single payment across multiple open invoices, start by navigating to the "Payments" tab in the customer’s record and selecting "+ New Payment".
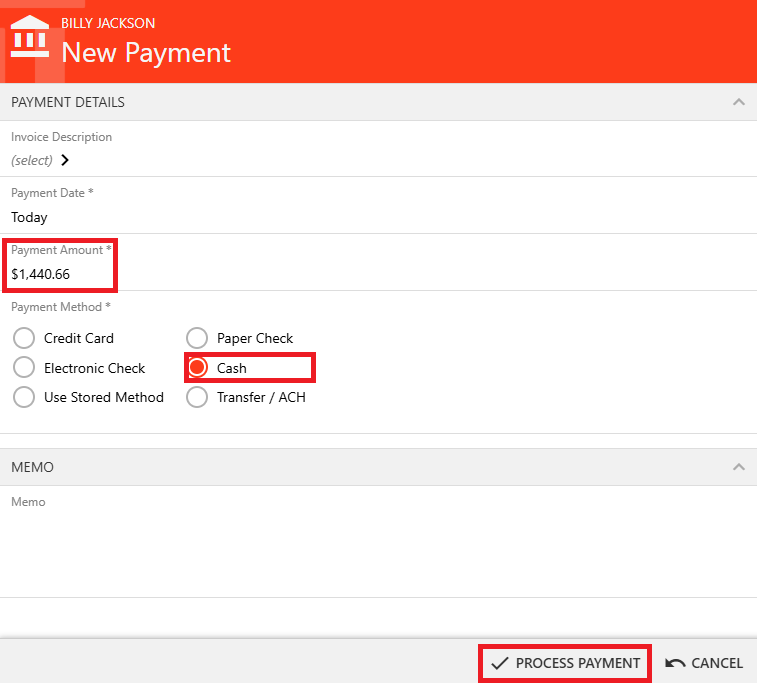
Enter the total amount due, leave the "Invoice Description" field blank, fill in the payment method details, and click "Process Payment".
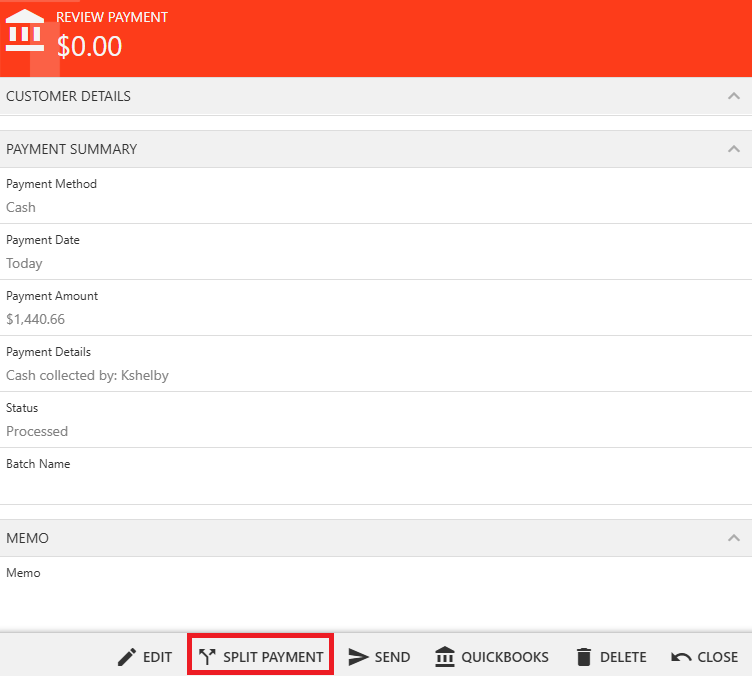
Once the payment is processed, open the payment record and select "Split Payment".
To associate a single payment across Multiple Invoices, start by navigating to the "Payments" tab in the customer’s record, and opening the payment record. Then select "Split Payment".

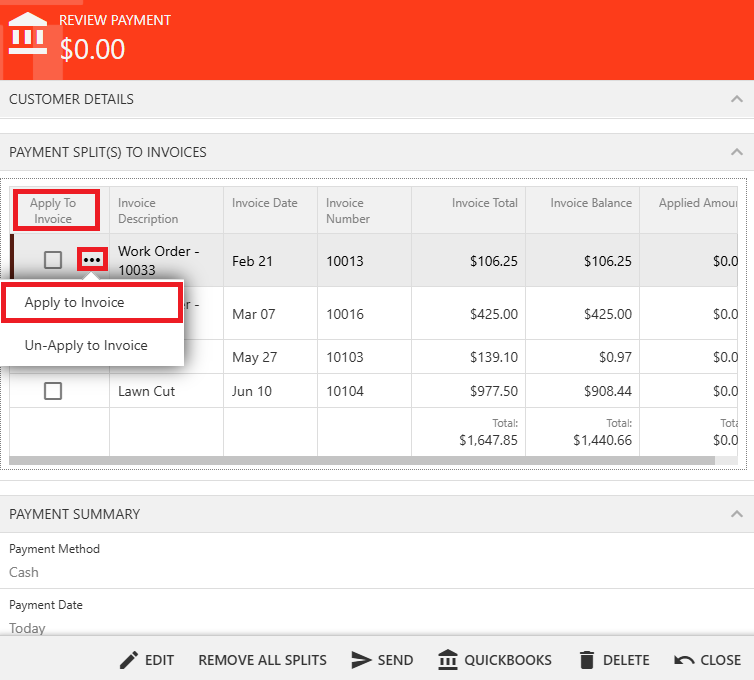
Under "Payment Split(s) to Invoices", hover over the first invoice in the "Apply to Invoice" column to reveal the ellipsis (three dots). Click it, then select "Apply to Invoice". This links the payment to that invoice. Repeat this process for all applicable invoices.
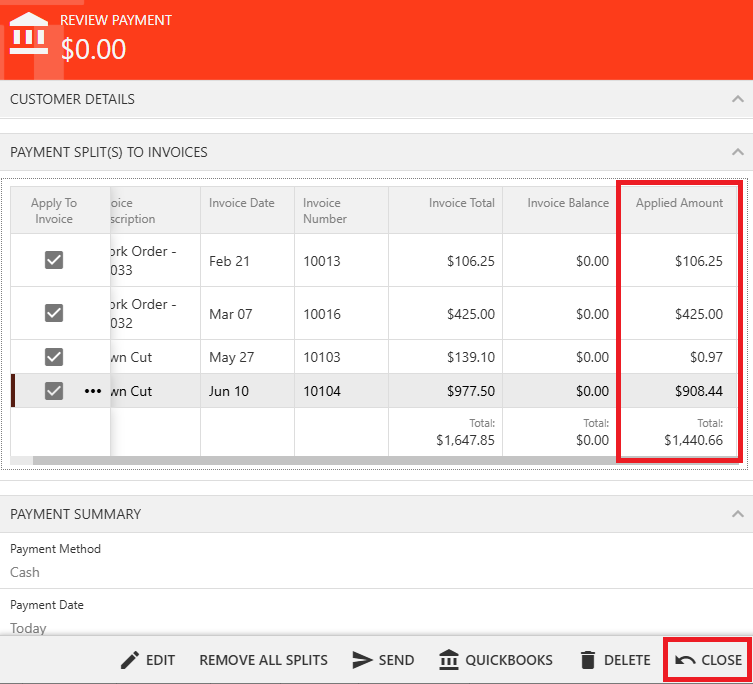
Select "Close" to complete the allocation. Cloud will update the Applied Amount column to reflect the payment’s association.
You have the option to send the invoice to the customer via the “Send” button at the bottom of your screen, rather than taking payment immediately. Your customer will then receive an email containing a copy of their invoice, along with the option to pay through the payment portal. A link to this portal is embedded in a button on the invoice, visible below the large red arrow.

When the customer downloads a copy of the PDF invoice and clicks on that pay button, they’ll be taken to the online Customer Portal where they can pay for their services. The resulting window will ask for either a credit/debit card or an electronic check. Once the customer has entered this information they can click the process payment option at the bottom.

The online Customer Portal also allows them to access previous work orders, invoices, and upcoming appointments. They can also “Book a Job” (if the portal bookings are set up) and can pay their balance in full.

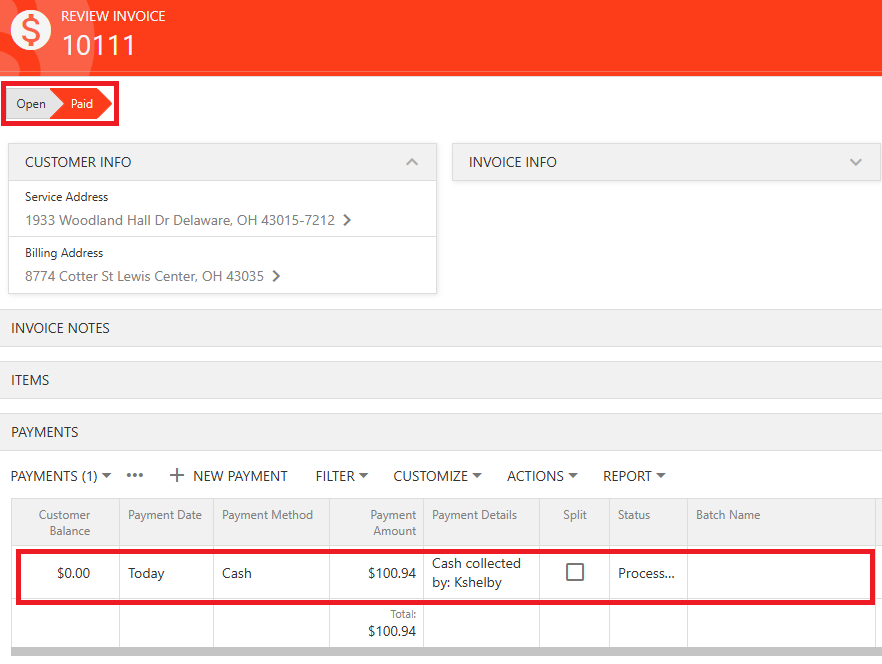
When a payment is processed, the attached invoice will be marked as paid and a payment record will be created and attached to the invoice. If you open a “Paid” invoice you should see a payment record stored in the “Payment” section at the bottom. Part of this information will be encrypted for security, but you can still see the amount, payment method, and date.

This section explains how to securely store a customer’s payment details without processing an actual charge. Once stored, these payment methods can be used for future transactions.
Go to Accounting Center and select Payments. Click on the plus symbol on the bottom-right of your screen.

Select the desired customer. Enter $0.00 as the Payment Amount.
Enter the Payment Method information.
Set the Store Payment Method toggle to ON (it defaults to ON if the customer has no balance).

Fill out the Billing Address and add any notes.
Then click "Process Payment".

Once approved, you can view the Stored Payment Method in a customer profile under the "Payments" tab.

You can also see a list of Stored Payment Methods by going to the Customers Center and search for a specific customer. Then click on "Stored Payment Methods" on the left of your screen.

If your business has linked a QuickBooks Online account to Smart Service Cloud, you can send copies of invoices and payments over to QuickBooks Online for your company’s records. This can be done on individual invoices or on multiple invoices and payments at once.
On individual invoices and payments, you have a “QuickBooks” button at the bottom of your screen which will create that record for you in QuickBooks Online. You will need to complete this step for both the invoice and for the payment record separately if you want them both in QuickBooks Online.

To send multiple payments or invoices over to QuickBooks online, enter the payments or invoices screen. From there, select “Pending for QuickBooks” on the left. This will filter the list so that it only shows the items that haven’t been sent over to QuickBooks Online. Once you select a few items (or use the “Select All” function) you’ll notice the “QuickBooks” button show up on the left.
Clicking this option will send the selected invoices or payments over to QuickBooks Online. Remember, this must be done for invoices and payments separately!
