
Integrations
Smart Service Cloud and QuickBooks Desktop Integration
Connect Smart Service Cloud to QuickBooks Desktop so you can import your lists and customers, and send invoices, quotes, payments, and purchase orders straight to QuickBooks. This guide covers installing the Cloud Desktop application, logging in, configuring your account, and using the QuickBooks Desktop commands day to day.
Before you begin
Have the following ready so the setup runs start to finish without interruption.
If you need to install or update the Smart Service Cloud application for the QuickBooks Desktop integration, download the latest version below.
Download Smart Service Cloud- The download email from Smart Service that contains your link to the Cloud Desktop application.
- A Windows computer with QuickBooks Desktop installed, plus permission to install software on it.
- Your Smart Service Cloud subdomain and login credentials.
- An employee record in Smart Service Cloud that has the QuickBooks role assigned.
The Cloud Desktop application is what allows Smart Service Cloud, which runs in your browser, to talk to QuickBooks Desktop, which runs on your computer. Install it on the same computer where QuickBooks Desktop lives.
1. Install the Cloud Desktop application
You will receive an email containing a link to download the Cloud Desktop application. Open that link, then follow the installer through to the end.
Start the download
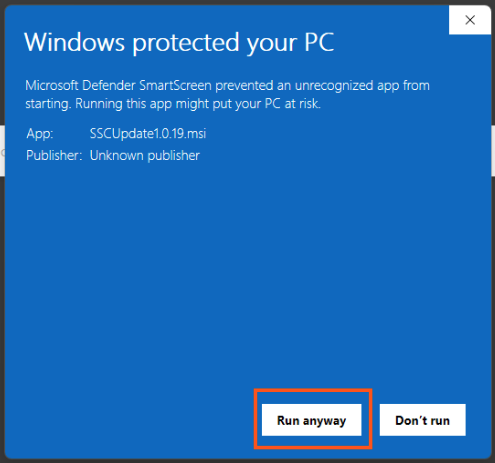
Microsoft Defender SmartScreen may flag the file during download. Select See more, then select Run anyway to continue.
Run the installer
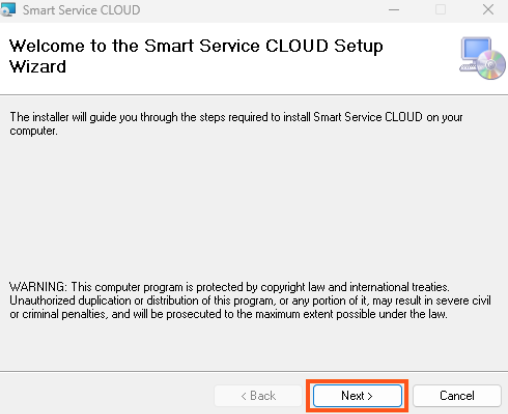
- Open the installer In the Installer window, select Next to begin.
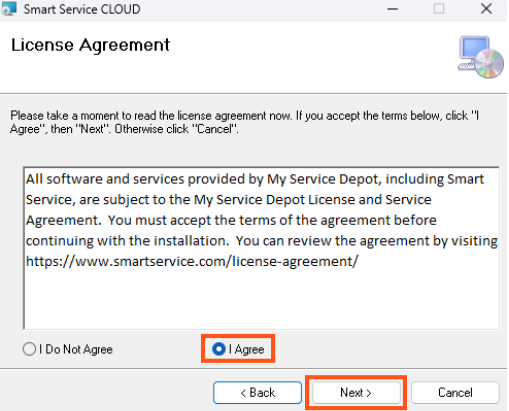
- Accept the License Agreement Agree to the License Agreement, then select Next.
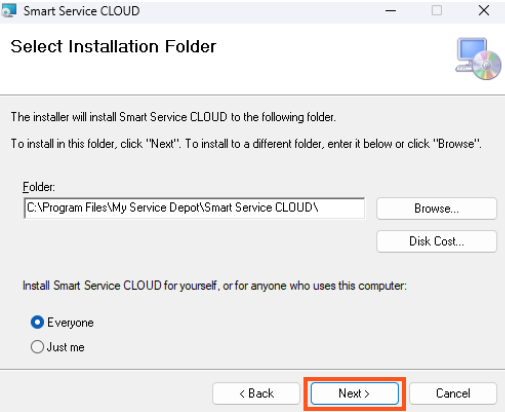
- Confirm the install folder Review the folder location and select Next. The default location works for most installations.
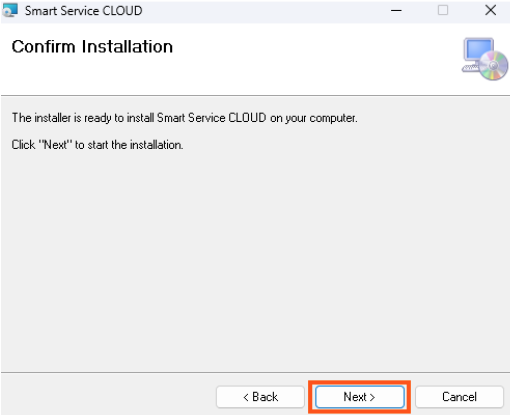
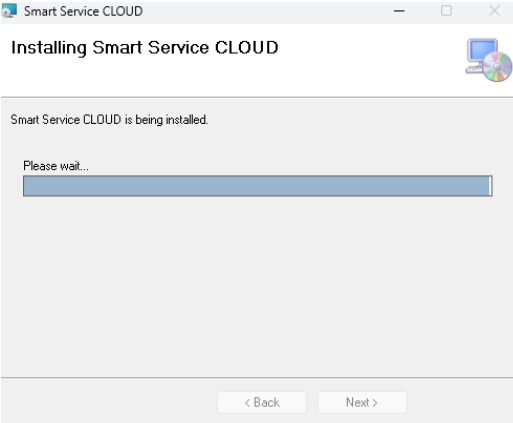
- Confirm the install Select Next to start the installation, then wait while the application is installed.
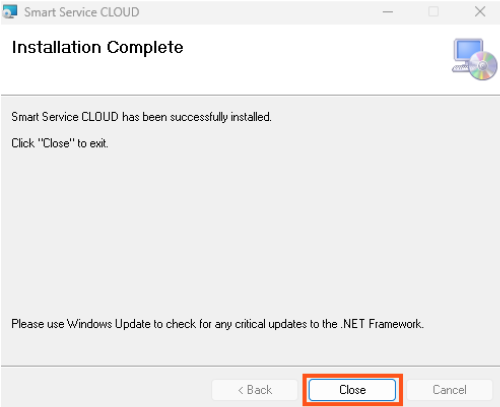
- Finish Once the installation is complete, select Close.
Open the application
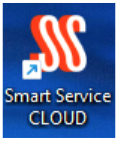
After installing, open Smart Service CLOUD from your desktop.
2. Enter your subdomain and log in
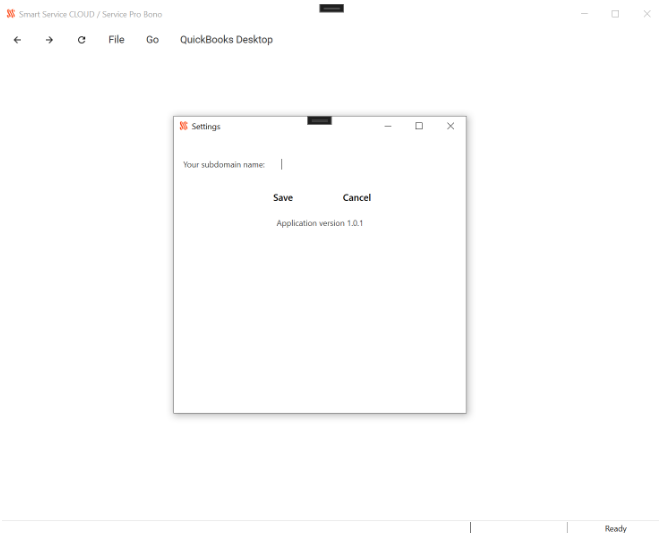
The first time you open the application you will see a login window with a Subdomain field. Enter only the subdomain portion of your Smart Service Cloud address, not the full web address.
- If your Smart Service Cloud URL is
- democompany.smartservice365.com
- Enter this in the Subdomain field
- democompany
Do not enter the full website address. Entering democompany.smartservice365.com instead of democompany will prevent the application from connecting.
After entering your subdomain, log in with your Smart Service Cloud credentials.
3. Configure Smart Service Cloud for QuickBooks Desktop
Two settings need to be in place before the QuickBooks Desktop commands become available: your account platform and your employee role.
Set your account platform
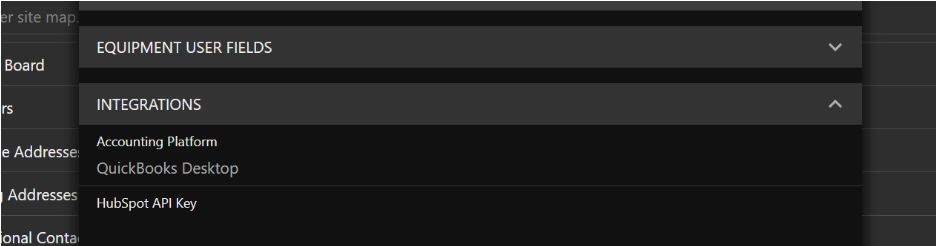
- Open System Settings In Smart Service Cloud, go to Administration > System Settings .
- Go to Integrations Navigate to the Integrations area.
- Select QuickBooks Desktop Confirm that your Account Platform is set to QuickBooks Desktop, then save your changes if needed.
Confirm your employee role
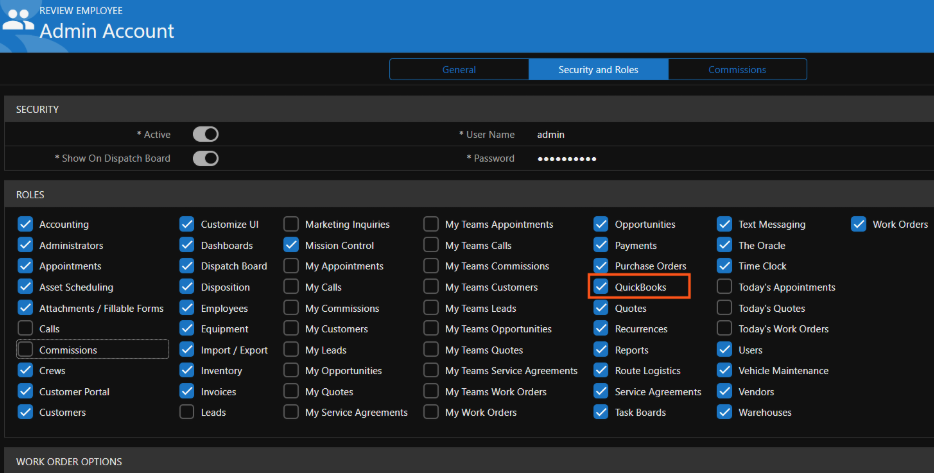
The employee account you use to access Smart Service Cloud must have the QuickBooks role assigned. To verify this, open the employee's settings, confirm that the QuickBooks role is assigned, and save any changes.
You must have the QuickBooks role before the QuickBooks Desktop commands appear in Smart Service Cloud. If the menu is missing, this is the first thing to check.
4. Import information from QuickBooks Desktop
With the Cloud Desktop application installed, your login complete, and your account configured, the QuickBooks Desktop commands are available inside Smart Service Cloud. Importing works in much the same way as the Smart Service Desktop integration.
| Import option | What it brings over |
|---|---|
| Import Lists | Items, classes, sales tax, and other applicable QuickBooks lists |
| Import Customers | Customers, classes, tax information, pricing options, and terms |
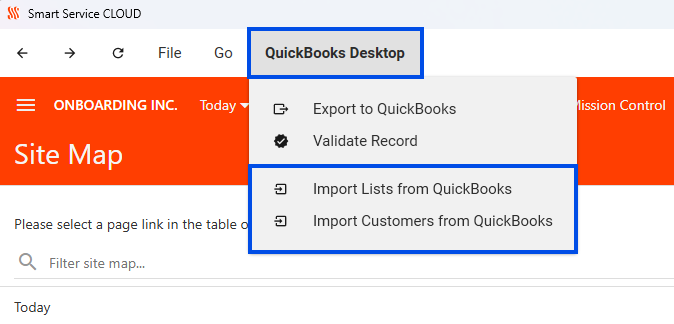
Open the QuickBooks Desktop menu and choose the import option you need to pull that information from QuickBooks Desktop into Smart Service Cloud.
5. Export records to QuickBooks Desktop
To export a record, first navigate to the record or list in Smart Service Cloud, then use the QuickBooks Desktop menu.
Pages you can export from
- Invoice Detail
- Invoice List, which lets you export multiple invoices at once
- Quote Detail
- Payment Detail
- Purchase Order Detail
Export a record
- Open the record Navigate to the applicable record or list in Smart Service Cloud.
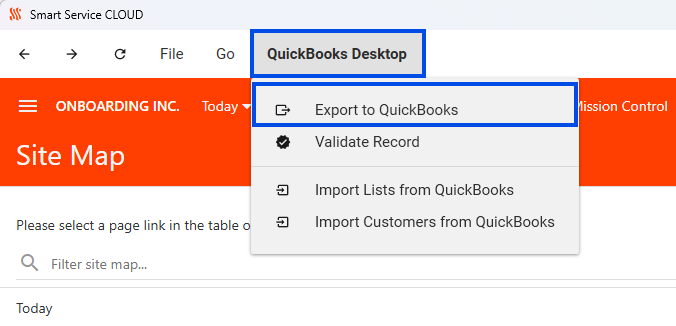
- Open the menu Open the QuickBooks Desktop menu.
- Select Export to QuickBooks Choose Export to QuickBooks and follow the application prompts.
Exporting from the Invoice List is the fastest way to post a batch of invoices, since you can send several at once instead of opening each invoice individually.
6. Check a record's QuickBooks status
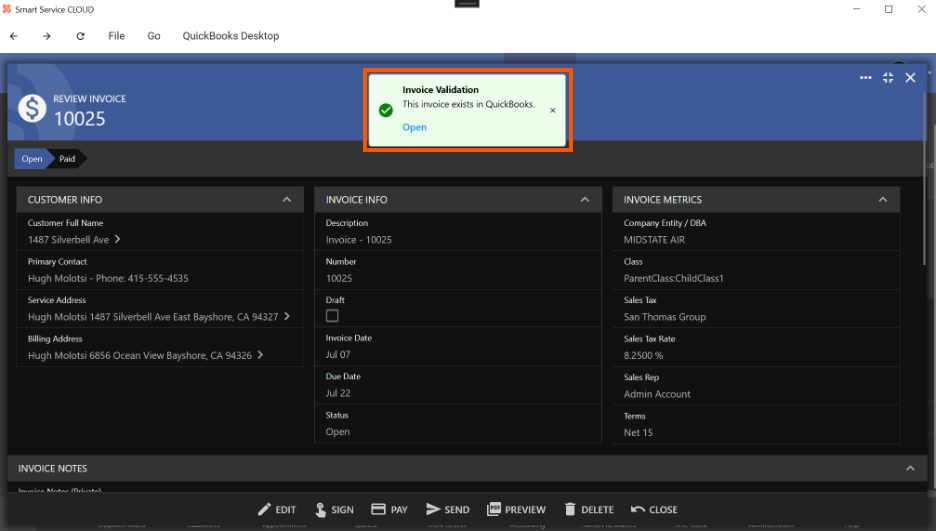
For each of the supported record types above, Smart Service Cloud shows the record's status in QuickBooks Desktop.
If the record already exists in QuickBooks Desktop, the application indicates that it exists and gives you an option to Open the matching record in QuickBooks. This is a quick way to confirm whether something has already been exported and to jump straight to it.
7. Find downloads and log files
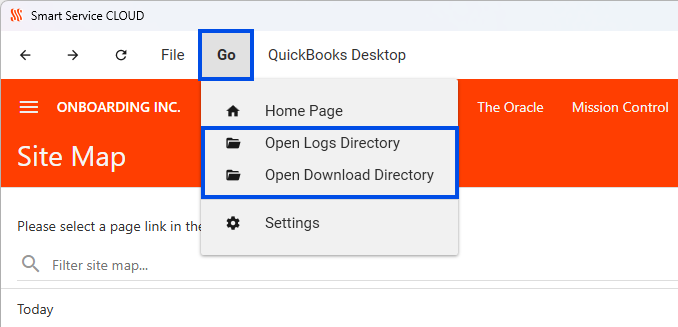
The Go menu at the top of the Cloud Desktop application opens the folders the application uses.
| Folder | What it contains |
|---|---|
| Downloads | Files downloaded through the application, such as PDFs |
| Logs | Application log files that help with troubleshooting |
If you run into an issue with the integration, support may ask you for information from the Logs folder. Knowing where to find it ahead of time speeds up the process.
Troubleshooting and support
If something is not working, start with these checks before reaching out.
- Confirm your Account Platform is set to QuickBooks Desktop under Administration > System Settings > Integrations.
- Confirm the QuickBooks role is assigned to your employee account.
- Confirm you entered only the subdomain at login, not the full web address.
- Confirm the Cloud Desktop application is running on the same computer as QuickBooks Desktop.
If the issue continues, contact your Smart Service support representative. Include a description of what you were doing, what you expected, and what happened instead, along with any log files from the Logs folder. That detail helps the support team diagnose the problem faster.
Contact the support team
Our support team is here to help with installation, configuration, and day-to-day questions.